Friday 24 April 2020

Odd Jobs

The COVID-19 pandemic, while filled with uncertainty and misfortune for everyone has had some positives when you look beyond the obvious.

I was made Furloughed a few weeks into the situation, which wasn’t ideal as I was working on a reduced salary, but I was able to commit all my time to my projects! This meant I was able to spend far more time on the Land Rover than I would have been able to normally, and perhaps ever!

So I tackled some jobs that I had been putting off.

In truth these jobs started mid way through part of the trailer project which will appear in the next post, but this post will be nice and quick and the other is still developing.

Direct to battery Anderson connectors - I’ve always had the idea of installing Anderson connectors front and back to allow jumping / charging of the battery without the need to get at the battery. Well well messing around with trailer electrical connections (next post) I install the front.


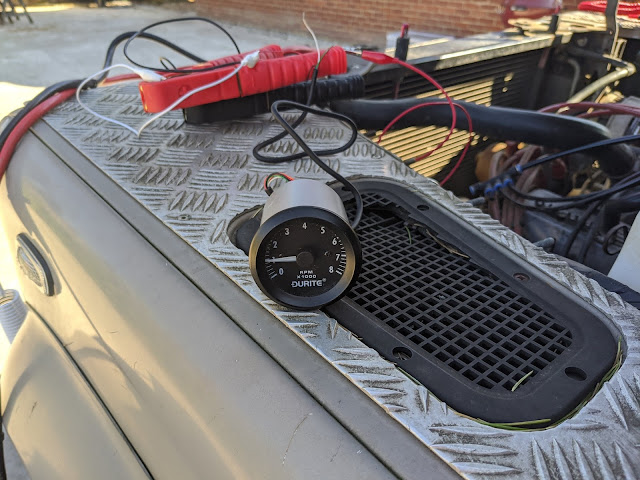
Next on the hit list: Tachometer. I’d used this before for testing but never installed it so here we go! First I set it up to make sure I had the right connection points.


Ran all the cables and mounted in, turned out to be fairly easy.


Binnacle mount - just like most Defenders mine suffered with broken plastic binnacle mounts.


So off with the old.


And here is the new.


This is why this job is a pain.


Forgot to get a fitted picture - maybe later……

Alpine seals - when I re-built the Defender all those years ago I didn’t realise that the apline seals came in two parts - outer seal and filler. As a result I used the old filler which was pretty poor back then, really bad now. Since then I’ve always had a slight leak in the cabin, which I suspected was from these poor seals. So time to change out for new.


New installed - with a bit of a clean up too.


And then I’m pleased to say the old girl got a much needed clean.


Making the most of a bad situation. 

Interior Trim

Now that the head lining is in, I’m able to fit the interior trim to the walls, I’ve got my old trims and the idea is that these will be covered in material to make them look new.


But first I finished off the sunroof trim which I was missing clips for.


This is the material opted for, is a leatherette type material.


I cleaned off the trim cards, have been stored for 10 years they’ve picked up some dust.


I then started fitting the material with glue, this did not go well. The straight runs were fine but in the corners and edges it was impossible to get the material to sit right. I tried cutting it into runs and even this didn’t work.


In the end I pulled the material off and cleaned off the glue. A new plan was needed. I did a lot of research and was fairly convinced that Raptor was the way to go. However I called up Buzzweld and they recommended something different - plastics in one.


B Pillar trims ready to go.


First coat to first batch, looking good.


The next day after drying I compared the new and old finishes


At this point I’m really happy the trims look like new, and very original. However the next challenge awaits, the trims i have have picked up some damage through use, the idea of the raptor was that the thick paint would coat over these marks, but plastics in one is a very light paint. To fix the damage I used glue which was sanded once dried.


This is the finished result, I’m so pleased with how it ended up, the damage that was repaired with glue is almost invisible, if you look close enough it can be seen as it’s smooth while the rest is textured, but you really have to be looking.

On to the install - after sufficient drying time! First removal of seat belts.


Then horrifically, I had to cut holes in the new roof lining to fit the trim, not a nice job!


At this point i also remembered I broke one of the retaining clips, so a new one was needed. But this part is not available! Typical.


So I needed to make a new one, I cut out a bit of steel to match.


And needed to put a bend in the end so found a socket that was the same radius.


And weld into place without melting the trim! And set at it with a hammer. This is the end result.


Now to weld it in place without melting the trim. Damp cloth at the ready.


And that's as good as I'll get.


Both window trims in place.


Middle roof trim with handle added in.


And the other side


With the dog guard in place.


All done! Trim for the first time in 10 years!!