As it's been such a
long time since then and now, that LaSalle have expanded their offerings to
include different finishes. After consideration I purchased the full 110 CSW
lining in the luxury finish RAL 9005 - Jet Black.
The product is
sturdy, strong and has a fluffy finish. It's made from a Glass fibre product
with the finish sprayed on - I've seen this finish before but can't think where. I like it a lot. The black I chose is very very
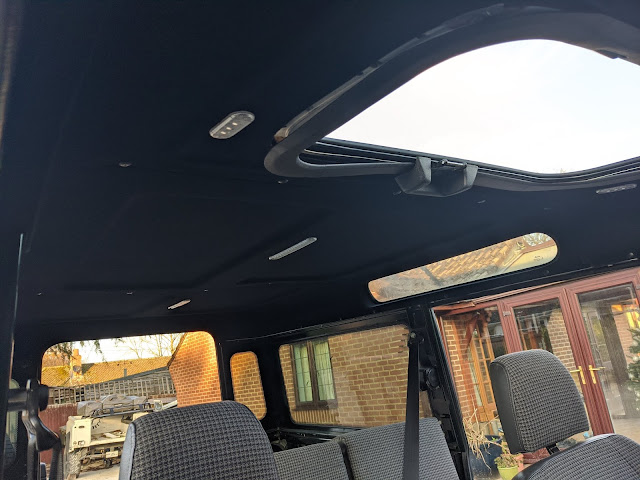
black, it looks great, but is so dark it's difficult to take pictures of!
Either way very impressed so far.
The
first part of the install was to fit the front section, my Defender has a sun
roof, and fortunately I had the foresight to save the original lining from this
area so I could trace in the opening and cut out the new. This is probably the
most well planned thing, that I've remember during this whole time!
The
only way I was able to accurately marked the head lining was to fit the
original on the finished side, mark with a pen, and drill the marks. This meant
I was able to use the jig saw to cut from the other side without damaging the
finish.
Next up I removed the lights I had temporally wired in.
And
fitted the new section, which in this photos was held in place by the (scabby looking) mirror bracket.
There was a small bit of trimming to do, so it came down to enable this. At the same time (as time with my assistant was limited), I got the back section into place.
Temporally screwed into place, with hole for the lights and cable.
I
then put back in place the front section, and drilled the centre section to
allow the fitting of the light.
Here we have all 3 sections in place, with door trims, final black fixtures, and lights fully mounted. Trim around the sunroof, and refitting the dog guard will be another post.
I'm really pleased
with the result and the way it looks. Makes the Defender a much nice place to
be. When I opened the packaging I was a little worried that the surface would
be really hard to clean, but during all the works I've learnt that it's pretty easy.
I found an airline or lint brush does a great job.
The process of
install was fiddly, but the instructions were clear. Definitely worth having
another pair of hands on the job!
Up next will be the
side trims - recover and fit!


No comments:
Post a Comment