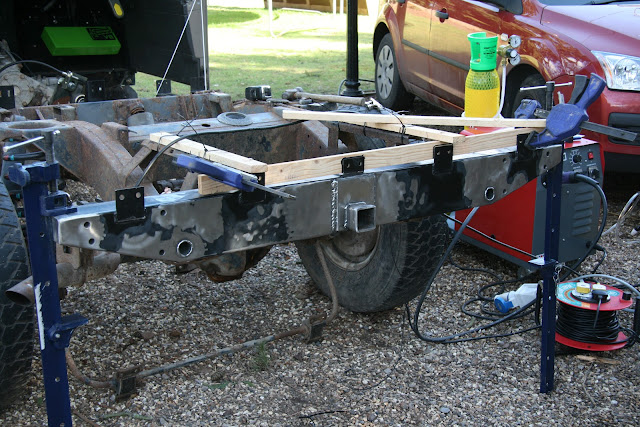
Another weekend and time for some more work to the
Defender. This weekend the cross member will be on!!!!
First up I lined up the cross member to the jig and
clamped it in place.
I tacked a couple of welds on so it would hold in
place and fitted the tub to make sure it lined up. It's as good as it can be but
the tabs are a little out, if needed I'll cut them off and re-weld. Important
thing is the centre one is correct and it measure up correctly every where
else.
Now it's time to weld it into place. Its quite windy today so I'm having a bit of a nightmare welding - hence the need to shield the weld.
Next up I cut and welded into place some support
brackets which I also sealed top and bottom.
Once the cross member was welded into place I
fitted the drop plate and 1 rear step - just to see what it will look like (one
day).
More brackets were cut and welded into
place.
Now I moved on to capping off the end sections -
normally mud from the rear wheels likes to sit here which helps the rusting
process.
First off I welded around the crush tubes to hold
the plates in place, then the out sides were ground down to better match the
profile of the cross member.
Then I welded the perimeter of the
plate.
Then the welds were ground down and smoothed
off.
Then the void between the bracket was capped, again
to stop the build up of mud.
Well the night has drawn in and work has stopped,
but before I finished up I managed to drill out and fit the hitch pin in the QD
tow bar slot.
There are a few more jobs on my list before the
cross member is fully complete, but for now its on.
Job list:
- Grind off and re-weld some shabby looking areas.
- Make provisions for rear wiring loom route (as I have capped off the original route!)
- Fit bolt into QD to bar to stop rattle
- Polish up cross member
- Give it a spray of under coat.
- Drill new hole in drop plate
Then after that, on to some other
jobs.
- Clean up the rest of the chassis
- Rust proof the rest of the chassis
- Fit a new fuel line
- Rust proof fuel tank and fit
- Rust proof / stone chip bottom of rear tub.


No comments:
Post a Comment