Monday, 30 May 2011

Bulkhead Swap - continuing.

Well it's been another good weekend (in between feeling really really ill).


Finished off the wiring and containment to the fans and it looks pretty neat and works!


Then lots of tidying around the dash, fitting new switches, installing stereo and fixing the fault with the loom!!! Well done to Ed who found the problem. Its all sorted and every thing works as it should.


Jobs still outstanding inlcude

  • Refit wheel arches
  • Refit airbox
  • Get screen fitted
  • Fit dash vent trims
  • Fit speakers
  • top up all fluids and bleed systems
  • Fit door cards.
  • Fit new speedo cable into transfer box

Monday, 23 May 2011

Bulkhead swap nearly finished

Well its been good progress over the weekend with only a few "minor" items to finish.


First off the OS wing was fitted, with PAS reservoir, expansion tank and radiator support arm.


Then I fitted the headlight, side light and modified the wing to take the new Td5 style indicator. Then on went the NS wing which had the heater flow unit attached, followed by radiator support arm and grill surround.


I then fabricated a frame unit for the two fans, as before they where mounted via a cable tied through the radiator and the wrong way round!


I then mounted the new fan frame with fans. and reinstalled the bonnet pins and support bar.


Next I fitted all lamps to the front, washer bottle with pipes and wiring. I also started the wiring to the fans. While I was doing this Ed arrived to lend a hand with the wiring loom, mainly changing connectors for nice new waterproof versions.


Quickly tonight I re installed the front doors, at the same time replacing all bolts for stainless versions. Looking like a Defender again!


Jobs left to do include:


Fit bumper

Fit Air box

Connect up front indicators

Get Nation wide to fit the glass (I was going to fit myself but they were cheaper!)

Sort the wiring loom so that the controls work! And then finish off the dash unit.


Yes, few problems with the loom, it seems that a few electrical items currently don't operate. Might need to spend a day or so poking around (Ed), either way bit of a nightmare. So if your a auto sparky or know your way around a Defender loom get in touch!!!!


Bits that don't work:


Headlights

Indicators (but hazards do)

Wiper motor

Washers

most dash lights

brake lights

reverse light

fog light


Bits that do:


Starter motor

hazards

side lights

dash light for side lights


Any ideas let me know! Might save me a few days of poking around.

Sunday, 15 May 2011

Refitting Bulkhead Continued

Well as I hoped progress over the weekend was good. I started out by putting the heater unit onto the bulkhead.
I then fitted the top water hose.

The lower dash then went on to better support and help organise the wiring loom

The the new style dash fascia was installed. I have decided to use this 2003 style dash fascia as I think it looks smarter.

I'm also opting for a Raptor dash, so both the lower dash and dash fascia had to be cut to allow fitment.

Here is the dash with the carcass of the raptor dash fitted, I think it looks very smart and will look even better with the dash panels and switches fitted.

Next I cut an refitted the vent control lever covers, there is a slight compatibility issue here so I've had to glue them in.

At this point I have taken out the LPG system and fitted the screen frame.

After much thought I've decided that I'm not happy with the dash finish around the vent controls, so I will be making my own out of aluminum. Here is the first cutting I have made. This will be sanded and painted black.

For most the weekend Ed has been lending hand trying to deal with the wiring loom, A job which I hate the look of, so thanks to Ed!

Friday, 13 May 2011

Refitting of the Bulkhead.

Things have started to move forward over the last couple of weeks, heres the progress made to date:


The bulkhead has returned from painting, while it was off I added to it the steering column, accelerator and brake pedal. I also popped in the washer jets and waxed the inside to prevent rust.

As you will be able to tell from the coming photo's I have decided on a colour, thanks to the 2 people that voted from the right colour! Epsom Green it is! ( I did say I wouldn't listen to the vote.)

Once I found someone to give me a lift I fitted it to the Defender.


After the bulkhead was fitted I reconnected the steering link, sills, rubber grommets and clutch pedal.


I then fitted the wiper motor and assembly. I have decided to use the Td5 wider set that was already fitted to the new bulkhead.


The remaining parts of the clutch system have been fitted.


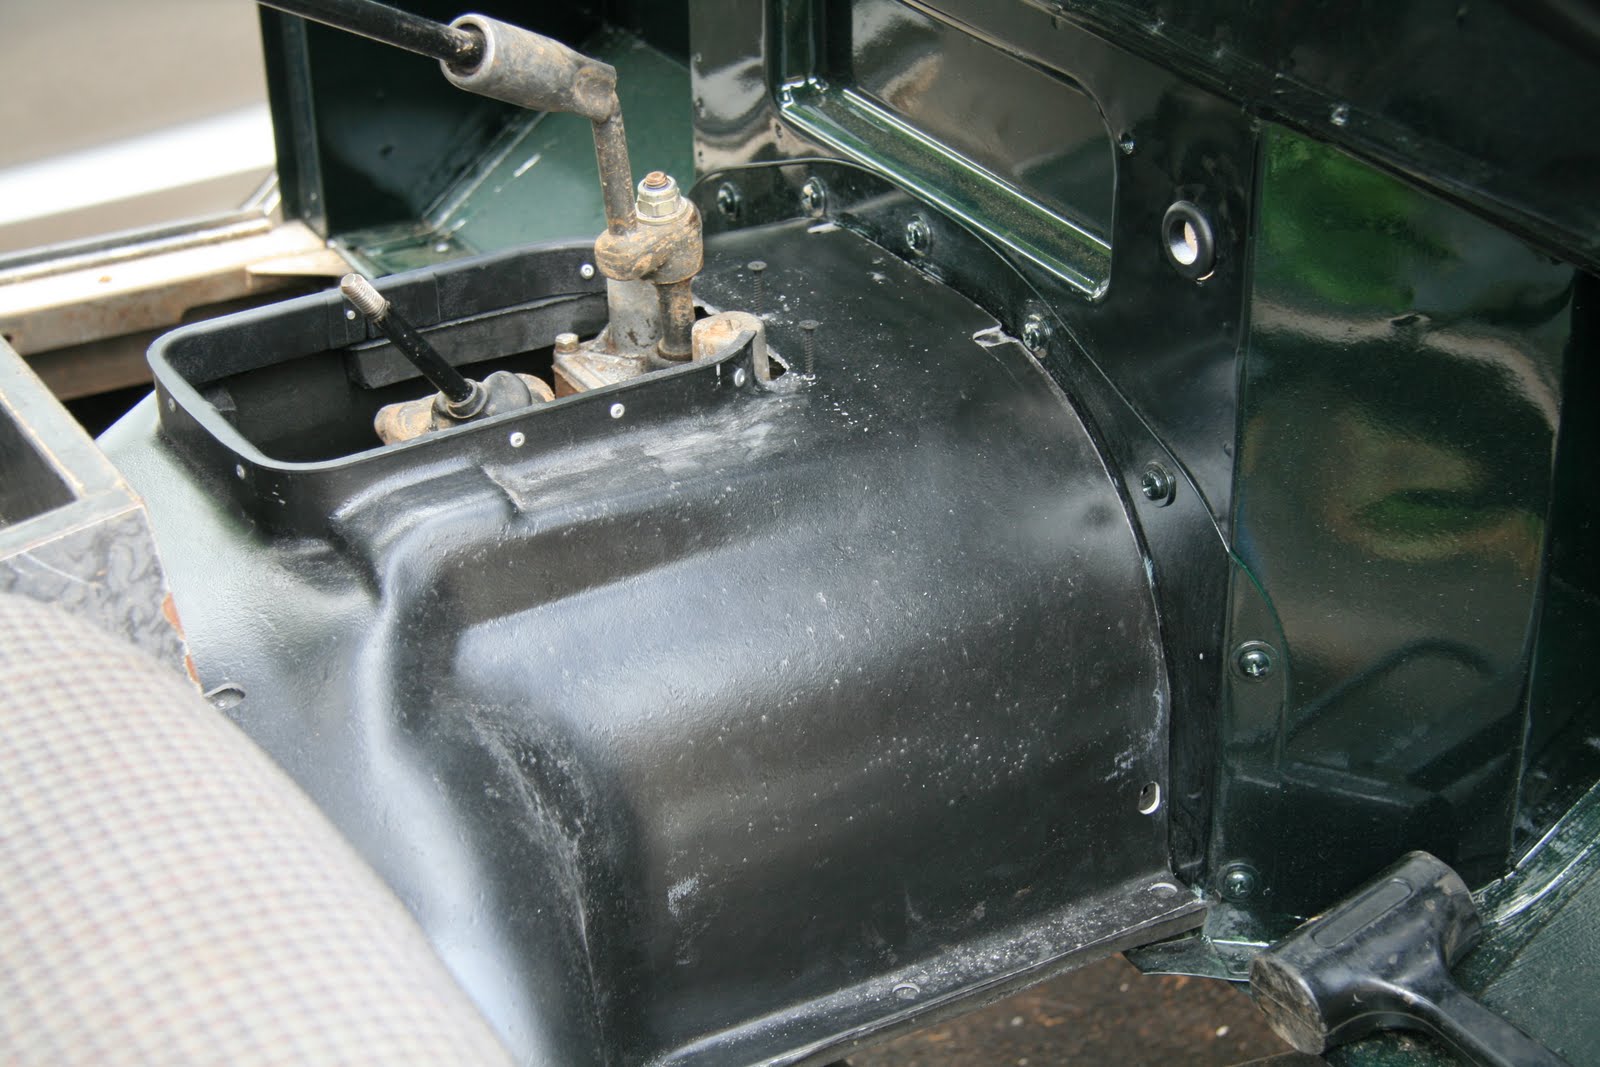
Got my new transmission tunnel cover, this type is for the R380 gearbox (which mines not), so it required some modification. First off it was cut to ensure it fitted, then screws where added to form a start for the fiberglass.


Then I extend the lip around the new opening with fiber glass. All this work seems a bit odd as I already have on the fits, but I do have a plan! Inside the cab I want to use the Exmoor Trim molded matting system, however they do not make a version for the V8 and have no plans to. So by using a trans tunnel cover for a R380 gearbox I can use the equivalent matting system! Although the matting system will need to be cut slightly to allow for the modifications I have made. I'll also need a custom gear stick gaiter! There is still a little bit of work left to do.  The end nearest the seats has a large gap where the new tunnel sits much higher than the old one. This will be filled with some sort of high density foam.


Next few tasks where fitting the internal dash skin, this needed to be cut to allow room for the Td5 wiper motor. The fuse board has been screwed into place and I've started to re thread the loom through the bulkhead.


I also glued into place the vent seals and fitted the flaps. 
Thats all for now, hopefully progress will be good over the weekend now I have now course work to hand in! (well for a few months at least.)

Sunday, 17 April 2011

Odd Jobs Prior to Bulkhead Fitting.

During the week I fitted new brake lines up front, new oil cooler hoses, new PAS hose and the refurbished radiator. I also messed around with the cultch hose but I need some nuts in order to fit the new one.


Over the weekend I completed a job which I started a while ago, removal of the old rusted roof rack.
First off I removed the the internal roll cage so I could then remove the rear interior trim and finally head lining to access the bolts.
Then I removed all the bolts and racks. The holes where then cleaned off, sanded down and hammered in so a dent was left on the outside ready to fill. I then used fiber glass to plug the holes from the inside.
Once the fiber glass had set, filler was applied to the outside and sanded. A quick spray of undercoat finished the job off, well finished for now.


Saturday, 9 April 2011

Bulkhead refit Prep work

Last weekend was spent sandblasting and painting various brackets and other parts before the bulkhead is refitted.
I also removed the bumper and radiator as both were knackered and in need of replacement, this also exposed more of the chassis ready for rust proofing. While I had the rad out I decided to find the part number and price for the replacement. Part number being ESR204 and to my horror replacement cost was over £800!! Not what I was expecting to pay. However I found a small place not far from me called Berkshire Radiators who were able to replace the core and recondition the old unit for a fraction of the cost! I look forward to getting that back next week.
This weekend I finished the painting of the brackets and treated the chassis. I decied that it would be a good idea to rust some of the chasis now whiel every thing is off. The chassis was first cleaned and allowed to dry all week, then rust convertor spray was used on some of the worst surface rust areas.
Here is what it looked like after the prep work.


I then laid out oil mats to soak up the overspray and set to work filling the chassis with cavity wax, which was a very messy job. I also managed to get a face full while spray with a pinched tube, that stuff is a nightmare to get out of your hair / ear / face. Holes needed to be drilled in a few spots to allow access for cavity waxing. The kit I brought from Dinitrol came with rubber plugs to fill the holes after.I have opted for Dinitrol as it seemed to be a better product, but like everything horses for course and all that. The kit i brought came with cavity wax, chassis hard wax, rust convertor aersol, spray gun for airline, rubber plugs and a full set of PPE (rubber gloves, mask, overalls and over shoes.)
I then sprayed the hard wax onto the outside of the chassis. Then end result looks quite smart almost like new!


Wednesday, 30 March 2011

Start of the Bulkhead Swap

Take a look at my Defender from here on in this will be the last time she looks like this. I now commence the restoration.


Time to remove the Bulkhead.
I started with the doors and moved on to internal trim and unbolting the wind screen, which didn't fall out as I expected and seemed to be welded into position. I decided to remove that later on.
Next removal of the dash unit and disconnecting the switches and gauges, labeling as I go (Shall see if that helps at all when it comes to reconnection!) Towards the end of the day Ed arrives to lend a hand; starting to remove the front grill and wings. I move onto the floor pan, and drilling out every single floor screw there is! Meanwhile Ed has made a lot of noise and fuss about something and removed the front grill and lights. I then take out all pedal units while Ed starts unbolting the NS wing and all that is attached to it. (I say unbolting however something's Ed decided not to unbolt, like the heater matrix. Instead opting for the pull, tug, twist and swear, which did eventually remove the unit, but in doing so the breather pipe connection which enters the alloy air tube from the carb was snapped off, which is nice. Another little extra job to keep me busy. Guess that's what you get at BMW main dealers - Brutality)

 End of day one.


I start the day with removing the OS wing, taking off the wheel arches to access the bolts to the bulkhead, removing all attached and mud shield fixings. Then move on to the NS wing same thing again.
Then removing the wiring from the bulkhead, trying to find out what wiring does what and where it goes, labeling it up, and pushing it through. I'm just hoping it works as well in reverse! The loom on this vehicle is crazy and its not helped by the addition of the LPG system were the colour coding of wires seems to be random. Ed turns up half way through the disconnection of the loom and removes the steering column.

Once all this is done we attempted to remove the windscreen. But it's pretty stuck. So we do what should have been obvious from the start and unbolt the B pillar from the roof, bit more forcing and its out!

The end is near just a few more bolts and the bulkhead will be removed, and I will have a Defender which is completely useless and static. Joy.
The end result; feels pretty strange sat in the drivers seat with just an engine up front.

Last job of the day is to compare the new and old bulkhead, cut out the holes required, patch the unneeded holes and plaster it with seam sealant ready for painting.

Inspection of the old bulkhead proves that a swap was defiantly needed, rot had truly set in and the repair job was very poor. The repair job on the OS consisted of painting the bulkhead grey, which wasn't particularly affective.


Next task: rust proof all I can see of the chasis, clean and paint any brackets before re-install.
Big thanks to Ed for helping out, I really couldn't have broken all that stuff with out him. (only joking, thanks mate)