So 17 months since my last blog – this is a record. Once
again the reason for my lack of progress is my home, which thankfully is extremely
close to completion, and just as close to being put up for sale! With this
almost new found freedom, I have found some time to get out and work on the
Defender – I also had to do some work as its MOT is due.
First Job I got stuck into was fixing the driver side door,
which would not stay latched – causing it to fly open around corners, or over
bumps. The classic bungee cord between the door handles has done the job up
until now, but I’m not sure this would get past an MOT inspector, the problem
had to be solved.
Not long ago I had replaced the latch to the driver’s door (Jan
14), my first error was buying a copy part, second was not noticing the level
of play in the hinges. This play, and the poor quality of the part has led to
the latch being damaged so much that it does not hold the door closed, but
simply gives up under a bit of pressure – whether its locked or not. So new
latch and new hinges.
The old latch was removed and the new genuine part installed
– the difference between the two is easily noticeable. The construction of the
genuine version is far superior and the gauge of metal is also thicker – but it
did cost twice the price…..
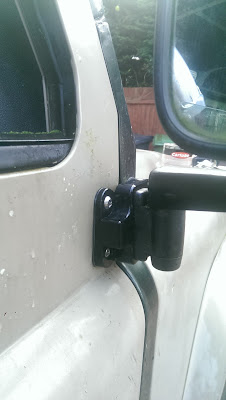
Then the hinges where removed.
I also found some time to fit the checker plate to the rear
load area. Now I’m not a huge fan of checker plate, and this will defiantly be
the largest area of the stuff on this vehicle. But it does offer protection and
grip, while also looking half decent. But this is it! Only the wing tops (maybe
bonnet not sure), in black will be covered in checker plate going forward.
So firstly I did the easy bit, the floor area. It was made
up of two bits and held in place with lashing eyes and some rivets.
Next I moved on to the wheel arches, which was more of a
pain. Firstly the material was cut into two sections, left and right.
I wanted each side to be one section as this would look much
neater. This presented the problem of trying to bend 3mm checker plate, without
a bender or press……
So it was clamped down, with uni-strut on the bending edge.
Then 3 ratchet straps where set up after the bend was
started. In this picture the straps have actually done most of the bending seen
here, it only needed to be just started.
After much swearing, and hammering on the corner along with
huge pressure from the straps, it came out quite nicely! Note if you are going
to do this – protect the straps from the edges of the checker plate otherwise
it may eat in to and damage your straps. Luckily I had some plastic angles just
for this job.
On the left side a lid was cut into the plate for the storage
box I made earlier, with hinges.
Hopefully more to come soon!


No comments:
Post a Comment